Home | 𝗧𝗮𝗰𝗸𝗶𝗻𝗴 𝘁𝗵𝗲 𝗖𝗵𝗮𝗹𝗹𝗲𝗻𝗴𝗲𝘀 𝗼𝗳 𝗦𝗔𝗪/𝗘𝗥𝗪 𝗪𝗲𝗹𝗱 𝗜𝗻𝘀𝗽𝗲𝗰𝘁𝗶𝗼𝗻 𝘄𝗶𝘁𝗵 𝗦𝗼𝗳𝗿𝗮𝘁𝗲𝘀𝘁’𝘀 𝗔𝗱𝘃𝗮𝗻𝗰𝗲𝗱 𝗨𝗹𝘁𝗿𝗮𝘀𝗼𝗻𝗶𝗰 𝗦𝘆𝘀𝘁𝗲𝗺𝘀!
Home | 𝗧𝗮𝗰𝗸𝗶𝗻𝗴 𝘁𝗵𝗲 𝗖𝗵𝗮𝗹𝗹𝗲𝗻𝗴𝗲𝘀 𝗼𝗳 𝗦𝗔𝗪/𝗘𝗥𝗪 𝗪𝗲𝗹𝗱 𝗜𝗻𝘀𝗽𝗲𝗰𝘁𝗶𝗼𝗻 𝘄𝗶𝘁𝗵 𝗦𝗼𝗳𝗿𝗮𝘁𝗲𝘀𝘁’𝘀 𝗔𝗱𝘃𝗮𝗻𝗰𝗲𝗱 𝗨𝗹𝘁𝗿𝗮𝘀𝗼𝗻𝗶𝗰 𝗦𝘆𝘀𝘁𝗲𝗺𝘀!

No more doubts about the quality of your SAW and ERW pipes even with the different quality standards that manufacturers are subject to!
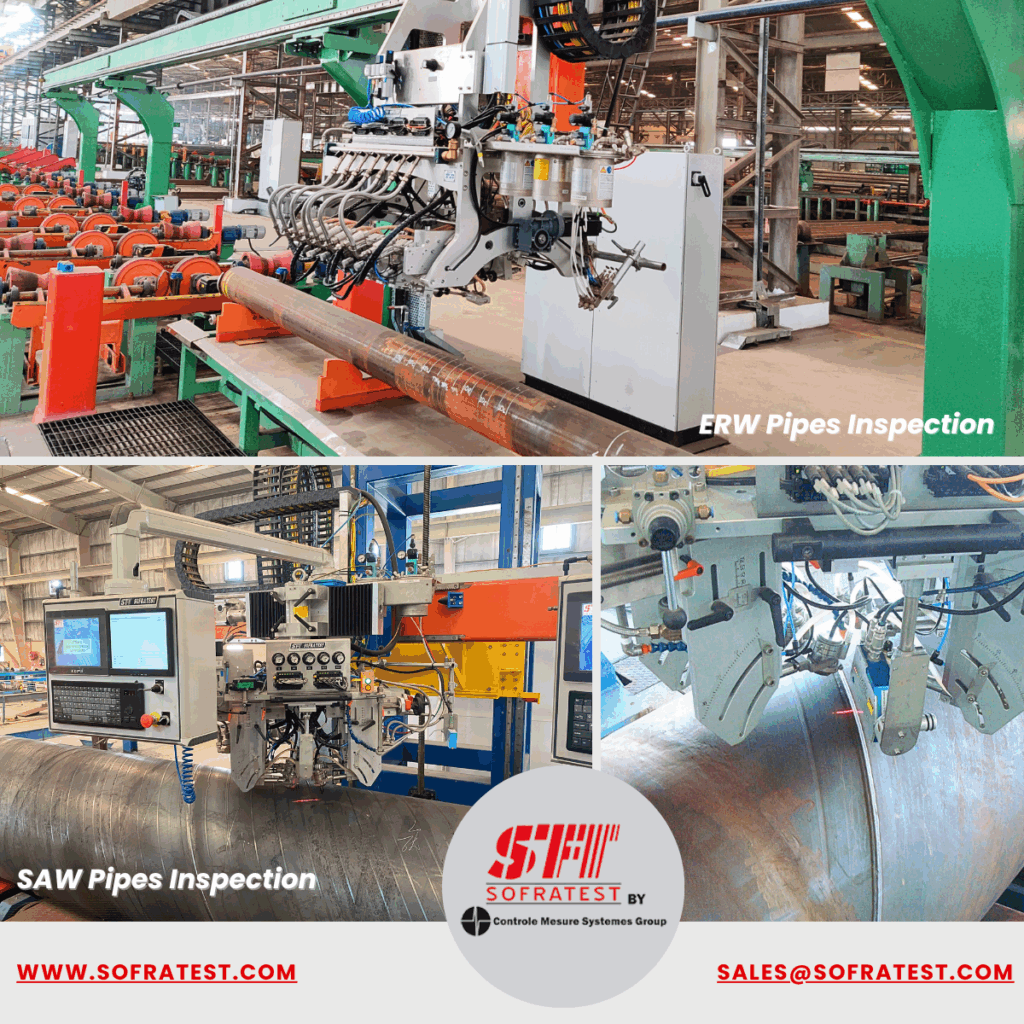
With Sofratest’s integrated inspection systems — combining state-of-the-art mechanics and advanced electronic monitoring — every weld defect is detected with precision:
✔️ Internal and external longitudinal and transverse weld defects (multiple probe configurations available: I, K, X)
✔️ Lamination defects in the Heat-Affected Zone (HAZ)
✔️ Mid-wall weld defects
✔️ Loss of coupling detection
Our mission is to enhance your industrial performance by adapting to your production line and product characteristics. That’s why our systems can be integrated either inline or offline, depending on your process.
Our smart mechanical design ensures precise and automatic probe positioning along the weld line for the most rigorous inspection possible.
Designed by our expert teams, our custom Ultrasonic probes are designed on demand to meet your specific inspection needs — guaranteeing high-precision and tailor-made performance.
Finally, all inspection data is fed directly into our dedicated software, enabling real-time analysis. Inspection results are then processed and compiled into a comprehensive inspection report for complete traceability.
Are you producing ERW or SAW pipes that require inspection?
Contact us to find your perfect weld inspection system!

Contact Details
6 rue des Loches
71100 SEVREY | France
Phone : +33.1.34.75.50.00
E-mail : sales@sofratest.com